Having recently walked the second half of the South Downs Way (Amberley – Eastbourne, 54 miles in 2 days!) I know firsthand what it’s like to get blisters. And let me tell you, it’s very, VERY painful. I’m a regular walker and trail runner, not often that kind of mileage I grant you, but I’m out every single day none the less, so I thought my feet could handle it. Clearly not.
With a big 3-day hiking adventure in Italy coming up in June and a few more long practice hikes in between I need to completely get to grips with how to prevent blisters when hiking long distances if I don’t want my feet to be in literal shreds.
Blisters are the most common hiking injury and whilst they’re not exactly major serious, they are incredibly uncomfortable, and they do run the risk of getting infected if not treated correctly. The three main factors that cause blisters are:
- Friction
- Moisture
- Heat
Unfortunately, all of these occur very easily when walking for long periods of time, and it only takes one of them to cause a blister. Combine all three, and you’ve got no hope!
Knowing how badly I suffered from blisters on my last long hike, I need to make sure it doesn’t happen again in Italy. While it is true that some people are more susceptible to blisters than others, there are also things you can do to help prevent them from occurring.
Here are my top 10 tips to prevent blisters when hiking long distances:
1. Wear The Right Footwear
Above anything else, if you want to prevent blisters when hiking long distances you need to make sure you’re wearing the right footwear. When it comes to hiking footwear you’ve got a few different choices and for the most part this will come down to personal preference. Hiking shoes are good if you’re walking mixed terrain and you want something a bit sturdier than a running trainer, but not as heavy duty as a hiking boot.
If you’re going on a multi-day hike you’re best off looking at hiking boots as these offer more support to the ankles and tend to be sturdier and better for rougher terrain. However, it’s worth bearing in mind that this means they will be heavier too, so as the miles rack up it can become harder to walk in them. Or if you’re looking for a multi-purpose shoe to help save a bit of money, trail running trainers can double up as hiking shoes depending on the terrain and the distance.
It’s definitely worth going along to a store to try a few different types of outdoor shoes on. Even if you don’t buy them there and then, because let’s be honest you can always find them cheaper online, it’s super useful to try them on and see the differences.
Some things to consider when buying hiking footwear if you want to avoid blisters:
- Grip – You don’t want to be worried about slipping and falling over, so look for hiking boots with deep rubber lugs on the base. This will give you better traction on rocks, mud and wet surfaces and will prevent unnecessary friction from occurring inside the shoes too.
- Protection – Hiking shoes need to protect your feet as you walk, both inside and outside. It’s up to you whether you decide to go waterproof or not, there are benefits to be had either way and I touch on this in a bit more detail in a moment. Keep an eye out for cushioning in those blister hot spots and toe caps if you’re hiking over rocky ground.
- Support – Low cut shoes won’t offer as much support as high or mid top boots.
Again, it all boils down to the terrain you’re walking on, as unstable ground means more stress on your ankles.
It’s really important that you also factor in things such as whether you’ve had any foot injuries in the past, whether you have wide feet, your body weight, and also the size and weight of the pack you’ll be carrying. All these things make a difference to the shoes you should be wearing. Ultimately, the best shoes to go hiking in are the ones that feel most comfortable to you. Everyone’s needs are different, there is no one shoe fits all here.
So, try on as many different types and brands as you can, until you find the perfect pair for you. You’re looking for that Cinderella moment when the shoe just fits. And she’s a good role model to have, because I’m pretty certain Cinderella didn’t have blisters!
2. Make Sure Your Shoes Fit You Properly
Although the type of shoes you wear to go hiking is important, what matters more is that they fit you properly.
Which is another good reason why it makes sense to go to a shop, as you’ll be able to try on a wider range of hiking shoes without having to commit to buying them first. Now, I know most of us already know what size our feet are, but when it comes to running trainers, hiking shoes, walking boots etc., more often than not you’ll need to size up from your usual shoe size. The reason for this is that when we walk for long distances our feet get hot and expand, so there needs to be enough room in the shoe to accommodate this. However, at the same time we need the shoes to not be too big as well, otherwise it’s blisters all round.
A good way to test whether a pair of hiking boots are too big is by walking up and down a small ramp or anything that’s on a slight incline.
If the boots are too big, you’ll notice your heels sliding towards the back of the boots when you walk up, and your toes hitting the front of the boots when you walk down. This isn’t good. You don’t want any movement at all.
You should notice straight away whether a pair of boots are too small for you, because it will be hard to get them on, they’ll feel instantly uncomfortable and as though you want to get them off, and your toes will feel squished. You want enough room to be able to wriggle your toes but not so much room they’re flapping around all over the place in there.
Ask for advice in the shop, as certain brands of hiking shoes will be better for wider feet, different pronation etc.
And remember you can always buy a pair of insoles to pop in your shoes if you’re between sizes or if you need extra support.
3. Tie Your Laces Correctly
Blisters are caused by repetitive rubbing against the skin, which can happen for a variety of reasons. One of those reasons is because your shoelaces might not be tied correctly. If the laces on your hiking boots are wrongly positioned or tied too loosely it can cause friction on the surface of the skin, which as the miles rack up so too do your chances of getting a blister.
If you want to prevent blisters when hiking long distances you need to lace your footwear tightly.
Not just the top part of the lace, but the whole length of it. This will help support the foot, holding it in place, so that there is less chance of movement within the shoe. It’s also worth remembering that your laces will become looser throughout your hike. Make sure you check them every so often, retying if needed, to ensure the fit is as it should be.
4.
Socks Make All The Difference
Arguably as important as the shoes you hike in are the socks you wear inside them. Socks really do make all the difference and don’t for one minute think you can get away with wearing those cotton flowery ones you wear round the house, because they really won’t cut it.
Choose the wrong type of socks and you’re destined for blisters. You want a pair of high-quality socks that have been specifically created with hiking in mind. Things to look out for include:
- Material – Cotton may be comfy, but they hold moisture and aren’t breathable so avoid if you don’t want blisters.
Instead look for socks made from moisture wicking, breathable fabrics such as Merino wool.
- Thickness – This depends on the time of year and weather conditions. Thicker socks will keep your feet warmer and will cushion your feet better, but remember if it’s hot your feet will sweat more. Thinner socks on the other hand are great when the weather is warmer, just bear in mind that they won’t offer as much cushioning between your skin and your boots and so there is an increased risk of rubbing.
- Size – The socks you wear when hiking need to be comfortable and that means getting the size right. Just as you would try shoes on before you buy them, try socks on too.
You want to make sure they fit snugly and don’t create wrinkles, as these could cause friction when you walk. Also, consider whether you might be walking in long grass, in which case choosing a longer length sock will help protect your legs.
- Liner Socks – These are a thin sock that you can wear underneath another pair of hiking socks to create a double-layer between your foot and the boot. Particularly good for people who are prone to blisters.
- Toe Socks – Aside from looking slightly strange, toe socks do offer the benefit of keeping your toes separate from one another and therefore reducing the risk of chafing on the skin in between.
5. Break Your Shoes In
Just like any new pair of shoes, it’s always recommended to wear them in a bit before taking them on any long outings.
New shoes take a while to soften up and mould to the shape of your feet, and hard leather hiking boots in particular are going to give you all kinds of problems if you haven’t broken them in.
When you first get them, wear them around the house to get used to the feel of them on your feet. After that, start wearing them in the garden, when you take the dog for a walk, when you go to the shops etc., so that you can get used to how they feel on harder ground and for slightly longer periods of time. You’ll quickly notice any areas of potential chafing, but don’t be too quick to write them off entirely as it could just be that they need more time to soften up. Better to do that now, rather than when you’re halfway through a 25-mile hike!
6.
Remove Debris
When you’re walking long distances it’s likely you’ll be covering lots of different terrain and parts of this terrain can gradually start to infiltrate your shoes. Items like sand, pebbles, bits of grit, grass, small twigs etc., can quite easily make their way into your shoe no matter how tight you’ve tied your laces. And when they do it can make walking really uncomfortable. If you can feel something inside your shoes, always stop and take them off to give them a good shake out as the friction from these bits of annoying debris can cause blisters.
Some hiking shoes feature a sock like collar, which helps to keep out debris, so if you know you’re hiking in forests, trails, along the coast for example where there is an increased chance of debris getting in your shoes, it is well worth looking out for this as a feature.
7.
Blister Tape
OK, so what if like me you’ve still got blisters from your last walk? Like seriously, the last big walk I did was 3 weeks ago and I’m still growing skin back! I don’t want to not go out for another walk, but my blister hot spots are still healing and the skin that is there is incredibly delicate, so the worry is that as soon as I put on my hiking shoes I’ll be reopening up the old wounds.
We can’t always hope for hike-perfect feet. The theory is that over time our feet toughen up, but in the meantime it’s all about protecting them in the best way possible.
One solution is to use blister prevention tape, like zinc oxide tape or kinesiology tape. This tape acts as a barrier between your sore skin and your sock, thus preventing further abrasion. It’s stronger than standard plasters or blister plasters, so stays in place and protects against dirt and moisture.
And even if you’re not starting out your hike with an existing blister, but you know the areas on your feet that have suffered with blisters on past hikes (heels, toes and arches are particularly vulnerable) it’s a good idea to tape those areas up in advance. It’s also worth carrying some of this tape in your first aid kit.
That way if you start to feel the signs of a blister developing, you can stop to put some tape on the offending area and this should be enough for you to carry on with your hike without causing further damage.
8. Keep Your Feet Dry
Blisters can be caused by excess moisture being trapped in your shoe. This is either from your foot sweating or if water from puddles, streams etc. has made its way into your shoe. Over time, the moisture softens your skin and when combined with the rubbing movement of walking, it can start to tear and break away, therefore creating a blister breeding ground.
One way to lessen the chances of trapped moisture and therefore being able to prevent blisters when hiking long distances is to dust your feet with talcum powder before putting on your hiking socks.
You should also keep a spare pair of socks in you day bag, so that you can change them if you feel as though moisture could be a problem.
Some people swear by waterproof hiking boots or Gore-tex shoes, however just be mindful that although they do a good job of stopping the water getting in, they also prevent moisture from getting out. Which means when your feet get sweaty, which they no doubt will, there’s nowhere for it to escape to. In my opinion it’s far better to go for a shoe or boot with mesh uppers, which OK yes, they may get wet if it rains, but they also dry out a lot quicker, and most importantly they allow your feet to breathe. And if your feet do get wet from wearing them, simply stop for a few minutes, dry them with a lightweight travel towel or cloth, change socks, and continue on your way with fresh feet.
9.
Let Your Feet Breathe
I know you’re not going to want to take too many breaks on your walk, after all you do want to get to your destination while it’s still daylight, but if you do start to feel that tell-tale hot, tingly sensation on your feet, it’s wise to stop and let your feet breathe. Sit down, take your shoes and socks off, and let the fresh air blow over them. Feels good, doesn’t it!
The benefit of doing this is that it will cool your feet down and dry them out, which are two of the things that cause blisters. So yes, your walk will take a bit longer than you planned, but if it means you avoid blisters, it’s well worth it.
If you really can’t bear to stop walking, because you’re worried about your muscles seizing up or that you’ll struggle to get going again, try something called the “chimney effect”.
This involves rolling the tops of your socks down over the top of your boots, which creates a kind of chimney to allow heat and moisture escape from your boots.
10. After Care
Unfortunately, some people are more susceptible to blisters than others and you could take all of the precautions above and still suffer from them. So, if you can’t prevent blisters when hiking long distances the next best thing is to make sure you know how to look after them if you do get them.
The fluid within a blister helps to protect the skin while it repairs itself, and so unpopped blisters are best left to heal by themselves. They should naturally heal within 3 to 7 days, although keeping them from popping can be tricky unless you plan on walking barefoot everywhere for the next week.
Some people believe that it is best to leave blisters uncovered and to allow the air to get to them so that they can dry up. However, you kind of don’t want them to dry up, because the fluid helps them to heal. I would suggest putting a blister plaster over them whenever you need to wear shoes. These are more padded than normal blisters and should allow the blister to remain intact.
If your blisters have already popped, it’s important to get them cleaned up.
Gently pat the area dry with some clean tissue, then wipe away any dried fluid or blood with a wet flannel. Dry thoroughly and then cover with a sterile dressing. Depending on the size and severity of the blister, it may take some time before the skin grows back fully, so just remember to take precautions if you’re planning on going on any long walks before they have completely healed.
Closing thoughts…
As I mentioned at the beginning of this article, my feet have still not recovered from a walk I did 3 weeks ago, and yet I’ve got a 25-mile walk planned this weekend and then a 3-day hike in Italy next month. I need to be taking all the blister prevention I can.
So, what have I learnt?
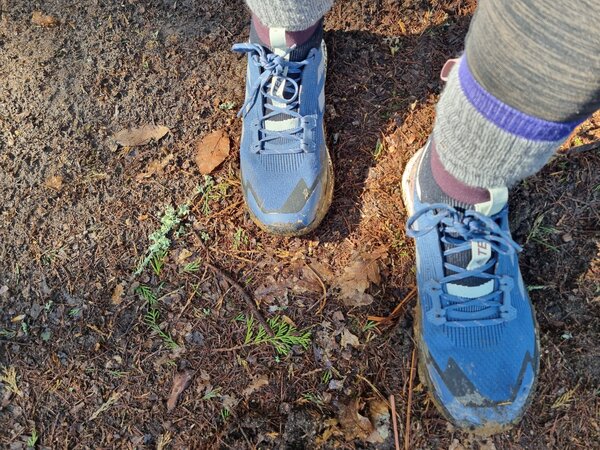
Well, firstly I’m switching up my footwear. Instead of the clumpy boots that I wore on the South Downs Way, which I’ve realised don’t allow me to tie the laces as tight as I’d like and therefore cause my feet to move around in them too much, I am trying out these TERREX Free Hiker 2 hiking shoes from adidas. As part of the adidas blogger community I am fortunate enough to be able to try out some of their products, and these could not have come at a better time!
I’ve already worn them on long dog walks and touch wood they haven’t given me any problems so far. The stretchy sock-like neck means my ankles feel supported and it also helps keep everything snug to my skin, therefore decreasing movement within them.
The laces can be tied a lot tighter than my other boots and best of all they’re super light. I know that my blister hazard areas are my heels and in between my toes, so I’ve taken precautions to tape those areas up and I’ve packed a spare pair of socks. I’m hopeful that just by changing these things it will be enough to prevent more blisters, but we shall see.
I guess the biggest thing I’ve learnt is that some of this stuff is trial and error. We tend not to worry about blisters until we actually get them, by which time it’s too late.
But we learn a valid and painful lesson along the way, which moving forwards helps us to prevent it from happening again. Here’s to lots more blister-free adventures!
*adidas hiking shoes gifted for review purposes
Original Article